Continuous Integration with Github Actions and Puppeteer
December 15, 2019Lately I've added continuous integration to my blog using puppeteer for end to end testing. My main goal was to allow automatic dependency update using Dependabot.
As my CI platform, I chose Github Actions, as it is super easy to work with, and it integrates beautifully with any Github repository you already have. The whole thing only took roughly two days of intermittent work, and I think the results are quite awesome.
I do want to give a shout-out to Nick Taylor, who published his article on the subject, and laid the ground work for my efforts here, so I encourage you to read his article as well.
My tech stack is quite different though. I chose puppeteer as my end-to-end framework for several reasons. The first is that it is written and maintained by the folks behind the chrome dev tools, so I'm guaranteed a life-time support (until Chrome dies out, which is not in the near future), and it is really easy to work with.
Another reason is that at home I'm working on a windows laptop with WSL (on which I'm running zshell with oh-my-zsh), and setting up cypress is quite a bit more difficult (although in our world nothing is impossible). Both reasons led me to choose puppeteer, and so far I'm not regretting.
End to end testing
End to end (or E2E) tests are different from other types of automated tests. E2E tests simulate a real user, performing actions on the screen. This kind of tests should help fill the blank space between "static" tests - such as unit tests, where you usually don't bootstrap the entire application, and component testing - which usually run against a single component (or a service in a micro-service architecture).
By simulating user interaction you get to test the experience of using your application or service in the same way a regular user would experience it.
The mantra that we try to follow is that it does not matter if your code performs perfectly, as long as the button the user should press is hidden due to some css quirk. The end result is that the user will never get to feel the greatness of your code.
Getting started with puppeteer
Puppeteer has a few configuration options that make it really awesome to write and validate tests.
Puppeteer tests can run in a "head-full" state, i.e. open a real browser window, navigate to the site being tested, and perform actions on the given page. This way you - the developers writing the tests - can see exactly what happens in the test, what buttons are being pressed and what the resulting UI looks like. The opposite of "head-full" would be headless, where puppeteer does not open a browser window, making it ideal for CI pipelines.
Puppeteer is quite easy to work with, but you'll be surprised with the amount of actions you can perform using an automated tool.
We'll start with a basic scraper that prints the page title when we go to https://dorshinar.me. In order to run puppeteer tests, we obviously must install it as a dependency:
npm i puppeteerNow, our basic scraper looks like this:
const puppeteer = require("puppeteer");

(async () => {
  const browser = await puppeteer.launch();
  const page = await browser.newPage();
  await page.goto("https://dorshinar.me");
  console.log(await page.title());

  await browser.close();
})();
What we do here is very simple, we open the browser with puppeteer.launch(), create a new page with browser.newPage() and navigate to this blog with page.goto(), and then we print the title. There are a bunch of things we can do with the puppeteer API, such as:
Running code in the context of the page:
(async () => {
  await page.evaluate(() => document.querySelector(".awesome-button").click());
})();
Clicking on elements in the screen using a CSS selector:
(async () => {
  await page.click(".awesome-button");
})();
Making use of the $ selector (jQuery style):
(async () => {
  await page.$(".awesome-button");
})();
Taking a screenshot:
(async () => {
  await page.screenshot({ path: "screenshot.png" });
})();
There is a bunch more you can do with the puppeteer API, and I suggest you take a look in it before diving into writing tests, but the examples I've shown should give you a solid ground to build from.
Integrating puppeteer with Jest
jest is an awesome test runner and assertion library. From their docs:
Jest is a delightful JavaScript Testing Framework with a focus on simplicity.
Jest allows you to run tests, mock imports, and make complex assertion really easily. Jest is also bundled with create-react-app, so I use it often at work.
Writing your first Jest test
Jest tests are super easy to write, and might be familiar to those who know other testing frameworks, by utilizing it, test, describe and other familiar conventions.
A basic test could look like:
function subtract(a, b) {
  return a - b;
}

it("subtracts 4 from 6 and returns 2", () => {
  expect(subtract(6, 4)).toBe(2);
});
You can also group multiple tests under one describe, so you can run different describes, or use it for convenient reporting:
function divide(a, b) {
  if (b === 0) {
    throw new Error("Can't divide by zero!");
  }
  return a / b;
}

describe("divide", () => {
  it("throws when dividing by zero", () => {
    expect(() => divide(6, 0)).toThrow();
  });
  it("returns 3 when dividing 6 by 3", () => {
    expect(divide(6, 3)).toBe(2);
  });
});
You can, of course, create much more complicated tests using mocks and other type of assertions (or expectations), but for now that's enough.
Running the tests is also very simple:
jestJest will look for test files with any of the following popular naming conventions:
- Files with
.jssuffix in__tests__folders. - Files with
.test.jssuffix. - Files with
.spec.jssuffix.
jest-puppeteer
Now, we need to make puppeteer play nicely with jest. This isn't a particularly hard job to do, as there is a great package named jest-puppeteer that can comes to our aid.
First, we must install it as a dependency:
npm i jest-puppeteerAnd now we must extend out jest configuration. If you don't have one yet, there are a number of ways to do it, i'll go with a config file. Create a file named jest.config.js in the root of your project:
touch jest.config.jsIn the file we must tell jest to use jest-puppeteer's preset, so add the following code to the file:
module.exports = {
  preset: "jest-puppeteer",
  // The rest of your file...
};
You may specify special launch configuration in a jest-puppeteer.config.js file, and jest-puppeteer will pass this configuration to puppeteer.launch(). For example:
module.exports = {
  launch: {
    headless: process.env.CI === "true",
    ignoreDefaultArgs: ["--disable-extensions"],
    args: ["--no-sandbox"],
    executablePath: "chrome.exe",
  },
};
jest-puppeteer will take care of opening a new browser and a new page and store them on the global scope, so in your tests you can simply use the globally available browser and page objects.
Another great feature we can use is the ability of jest-puppeteer to run your server during your tests, and kill it afterwards, with the server key:
module.exports = {
  launch: {},
  server: {
    command: "npm run serve",
    port: 9000,
    launchTimeout: 180000,
  },
};
Now jest-puppeteer will run npm run serve, with a timeout of 180 seconds (3 minutes), and listen on port 9000 to see when it will be up. Once the server starts the tests will run.
You can now write a full test suite using jest and puppeteer. The only thing left is creating a CI pipeline, for which we'll use github actions.
You can add a script to your package.json file to execute your tests:
{
  "scripts": {
    "test:e2e": "jest"
  }
}
Github Actions in a gist
Lately Github released a big new feature called Actions. Basically, actions allow you to create workflows using plain yaml syntax, and run them on dedicated virtual machines. In your workflow you can do pretty much anything you want, from basic npm ci && npm build && npm run test to more complicated stuff.
I'll show you how to configure a basic workflow running your puppeteer test suite, and prevent merging if your tests don't pass.
The easiest way to start is to click on the Actions tab in your github repo. If you haven't configured any action before, you'll see a list of previously configured workflows, from which you can choose one with some predefined configuration.
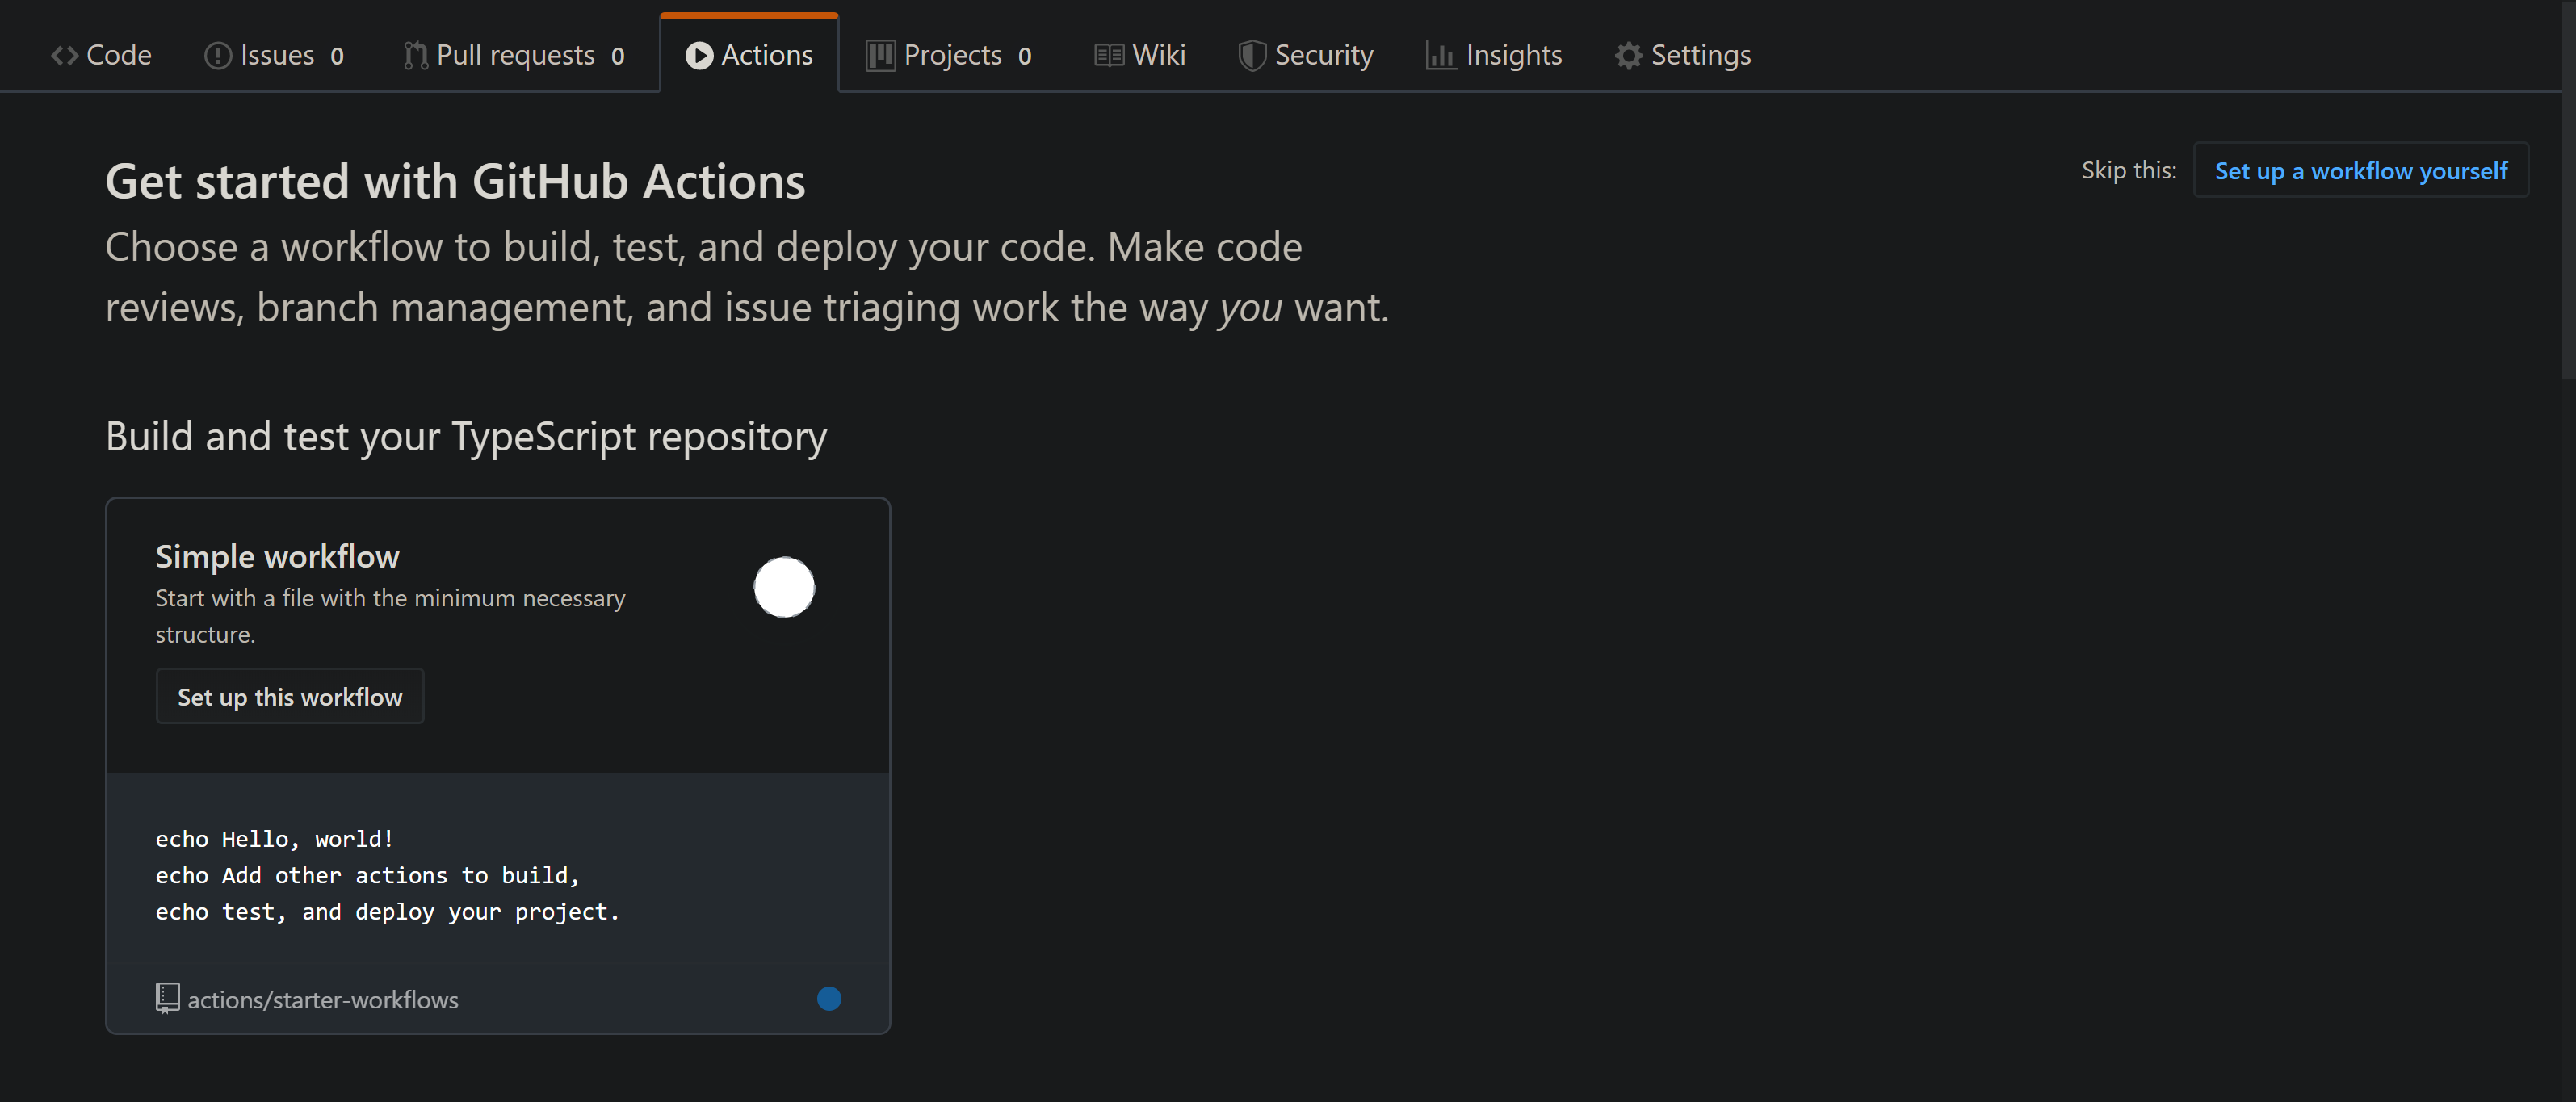
For our case, choosing the predefined Node.js action is good enough. The generated yaml looks like this:
name: Node CI

on: [push]

jobs:
  build:
    runs-on: ubuntu-latest

    strategy:
      matrix:
        node-version: [8.x, 10.x, 12.x]

    steps:
      - uses: actions/checkout@v1
      - name: Use Node.js ${{ matrix.node-version }}
        uses: actions/setup-node@v1
        with:
          node-version: ${{ matrix.node-version }}
      - name: npm install, build, and test
        run: |
          npm ci
          npm run build --if-present
          npm test
        env:
          CI: true
In the file you can configure the workflow name, jobs to run, and when to run the workflow. You can run your workflow on every push, on new pull requests or as a recurring event. Jobs in a workflow run in parallel by default, but can be configured to run in sequence. In the above workflow, there is one job named build.
You can also choose the OS on which your workflow will run (by default you can use Windows Server 2019, Ubuntu 18.04, Ubuntu 16.04 and macOS Catalina 10.15 - at the time of publish) with the runs-on key.
The strategy key can help us run our tests on a matrix of node versions, in this case we have the latest versions of the latest LTS majors - 8.x, 10.x and 12.x. If you are interested in that you can leave it as is, or simply remove it and use any specific version you want.
The most interesting configuration option is the steps. With it we define what actually goes on in our pipeline. Each step represents an action you can perform, such as checking out code from the repo, setting up node version, installing dependencies, running tests, uploading artifacts (to be used later or downloaded) and many more. You can find a very extensive list of readily available actions in the Actions Marketplace.
The basic configuration will install dependencies, build our project and run our tests. If you need more (for example if you want to serve your application for e2e tests) you may alter it to your liking. Once done, commit your changes and you are good to go.
Forcing checks to pass before merge
The only thing left for us is to make sure no code can be merged before our workflow passes successfully. For that, go to your repo's settings and click on Branches:
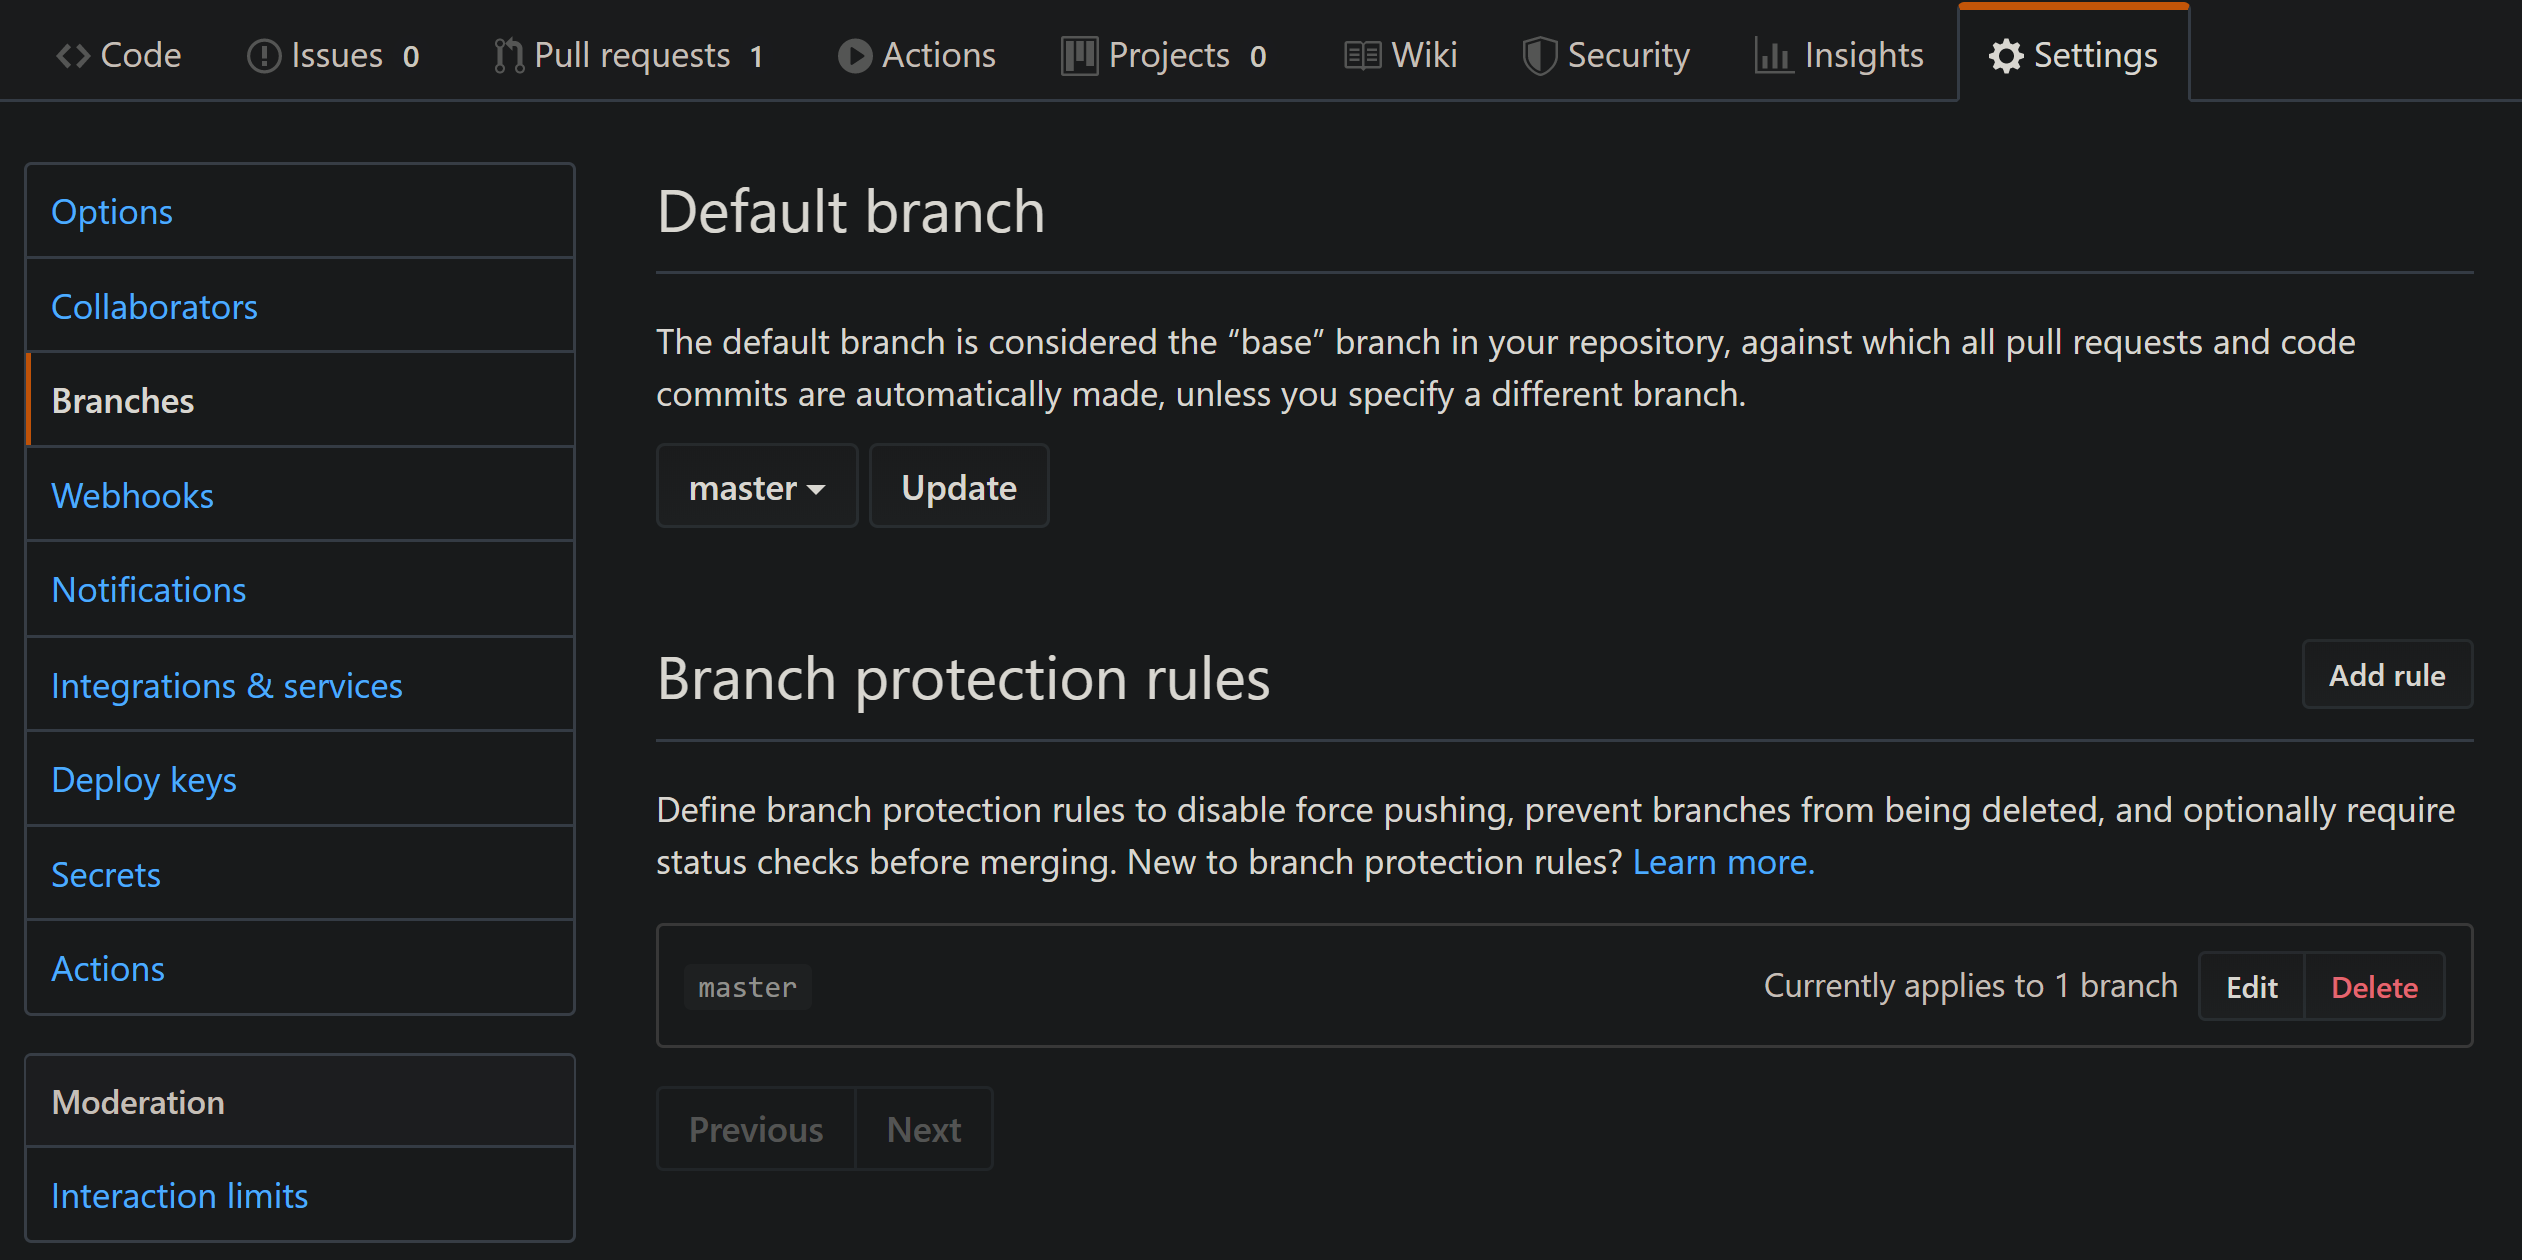
We need to set a Branch protection rule so that malicious code (or at least one that doesn't pass our tests) won't be merged. Click on Add rule, and under Branch name pattern put your protected branch (master, dev or which ever one you choose). Make sure Require status checks to pass before merging is checked, and you'll be able to choose which checks must pass:
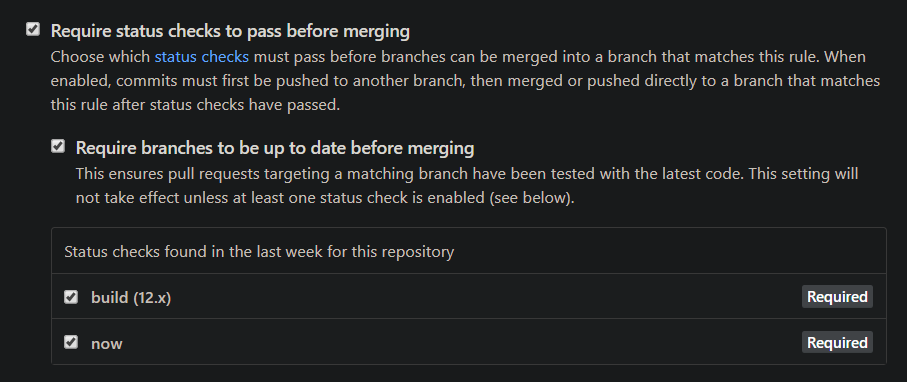
Click on Save changes below, and you're good to go!